
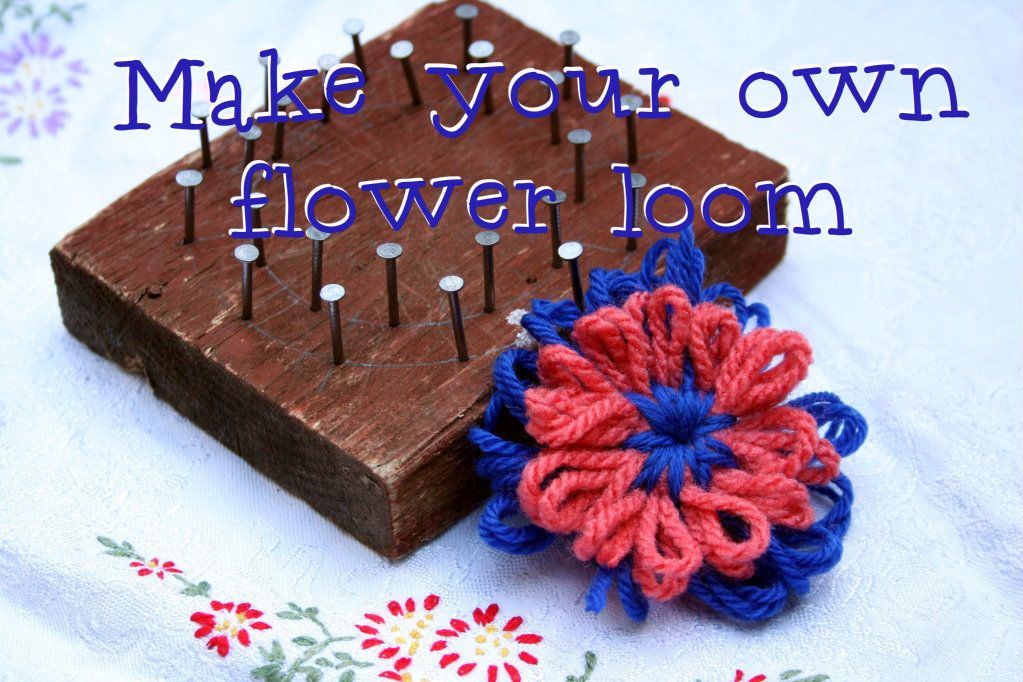
at one of our home school groups a few weeks ago, somebody had brought their flower loom in for the kids to use. kiki especially loved it and asked if we could buy one. the plastic ones looked pretty flimsy and easily broken, and i figured i could probably make my own fairly easily.
what you'll need:
a piece of wood - around an inch thick and 5inches square
24 nails
hammer
circle templates to draw around
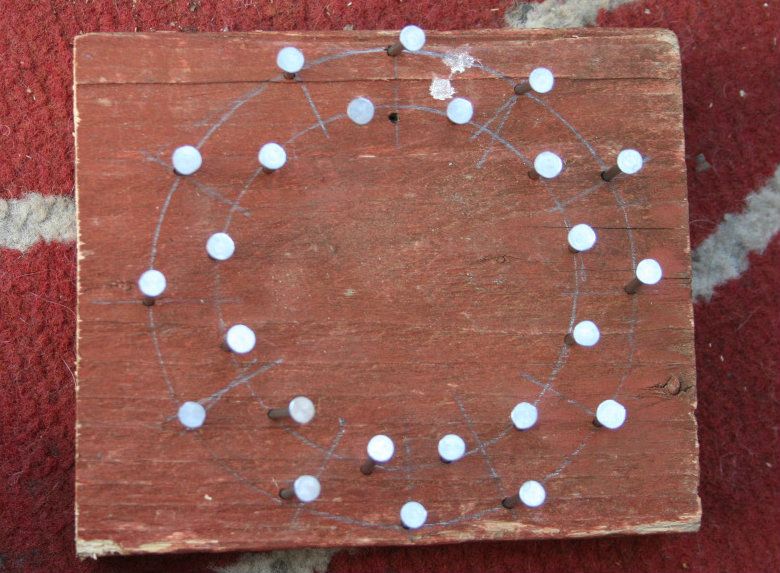
step one
find two circle shapes to use as templates, the largest should be almost as big as the square, and then the second needs to fit within the first. draw round the largest first, then the smaller circle, like so:

step two
mark lines across the outer circle to show you where to hammer in the nails. mark the inner circle in between each of the marks on the outer circle {see below!!!}

step three
hammer nails in on each of the marks you just made, i used nails that were around an inch long, and hammered about a third into the wood.
that's it! your loom is ready to use.
to weave a flower on your loom is fairly easy -
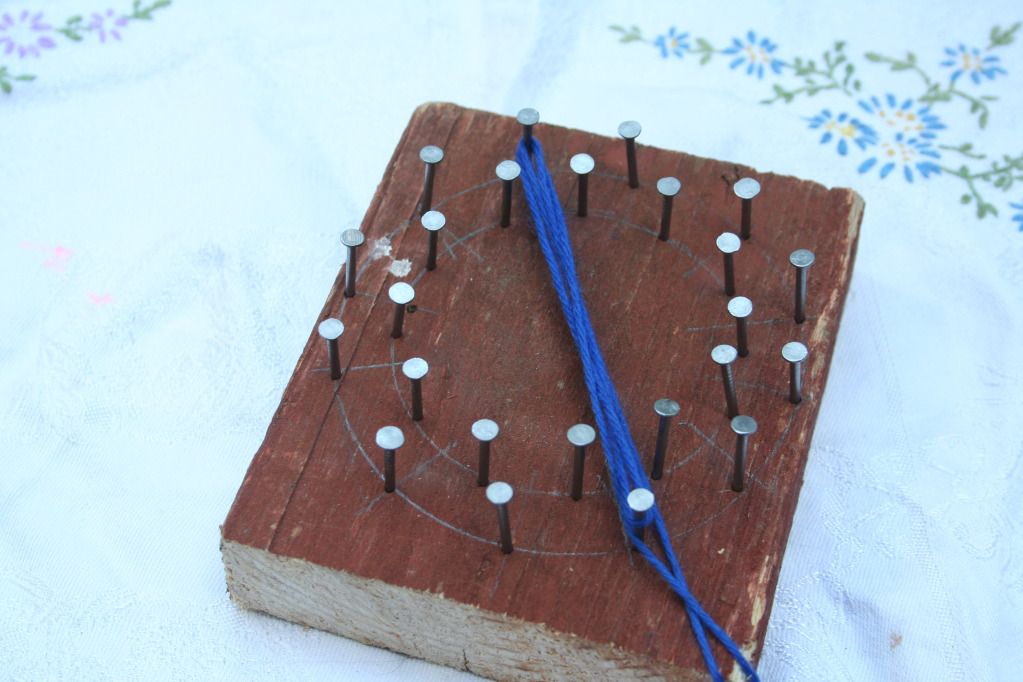
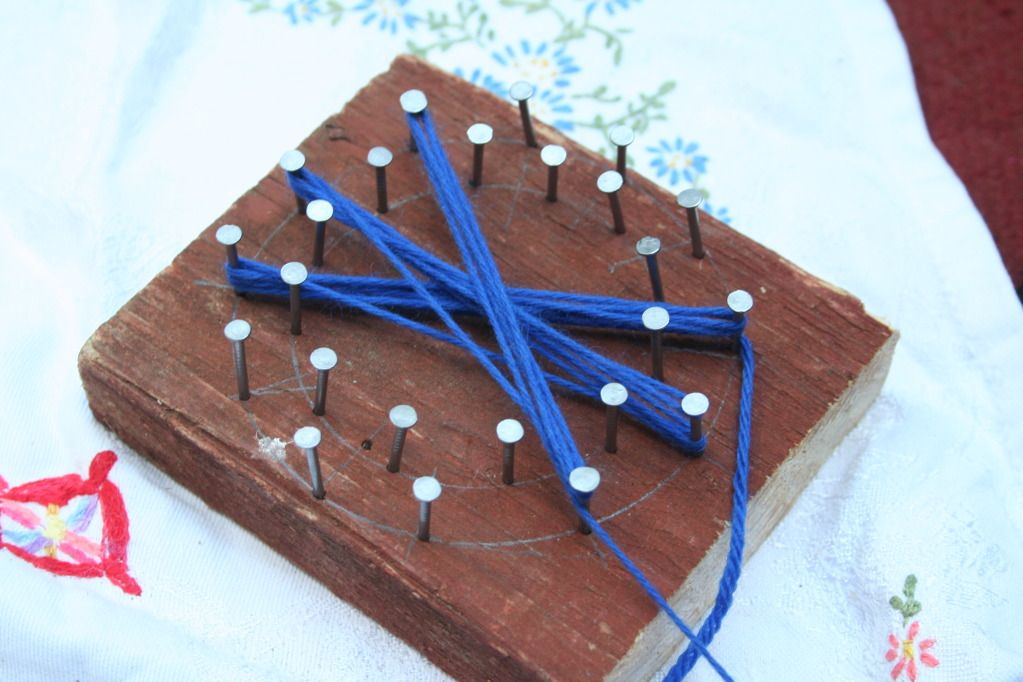
using your first colour yarn, leave a tail and wrap in a figure of eight the yarn around two oppostie nails on the outer ring, two or three times. work your way around the whole loom, always wrapping in a figure of eight between opposite nails until you've covered them all. leaving a tail again, cut the yarn
then, switch colours and repeat, this time on the inner circle of nails - figure of eight wrapping around oppostite nails.
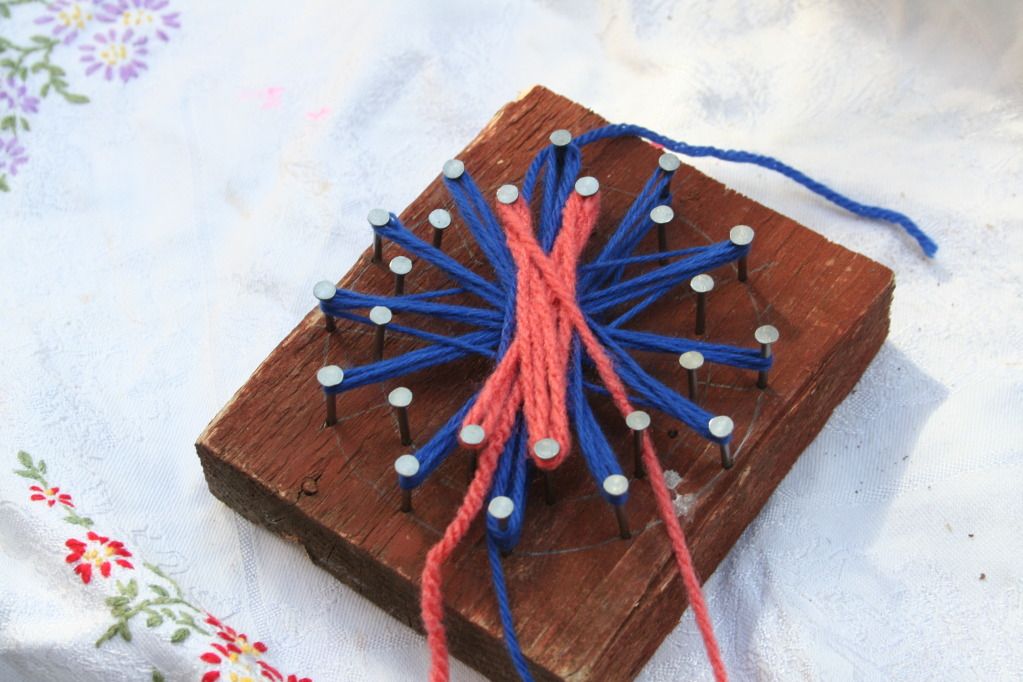
when you've covered all the nails again, cut the yarn off leaving a tail.
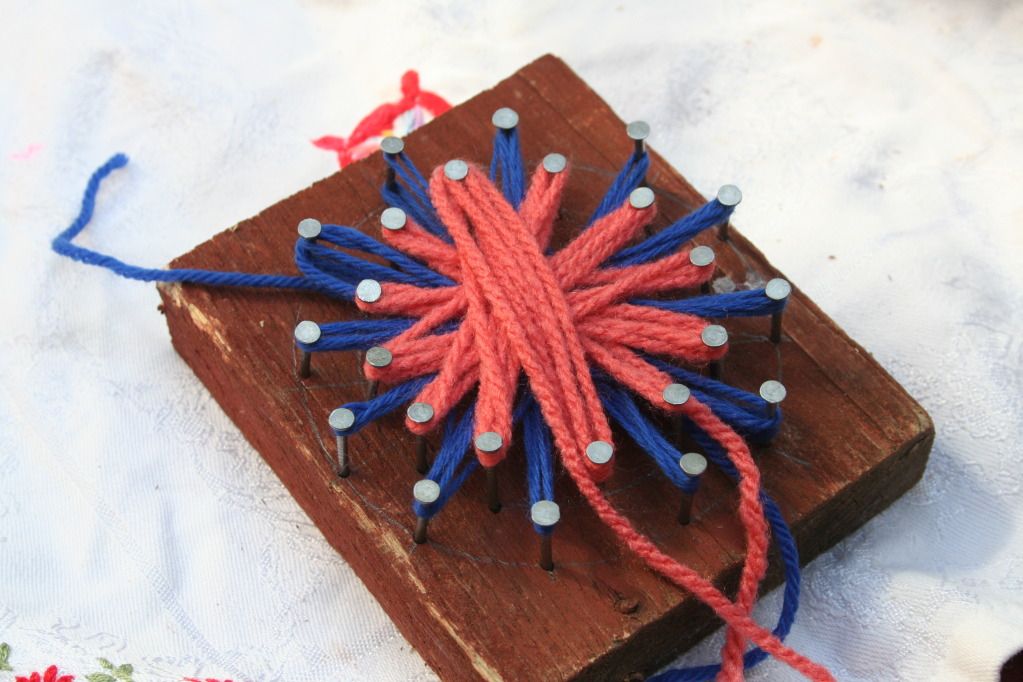
then you need to take a lenght of the first yarn you used and a darning needle and sew through the middle of the flower. up through the centre and down between each 'petal' that you have created, it's very important to make sure you catch all of the loops so that your flower doesn't unravel!

once it is securely sewn you can remove it from the loom. carefully lift each loop over the nail. these flowers make great brooches, can be sewn on to headbands or bobbles or used to decorate clothing etc...
i hope you've found this tutorial helpful - if you have any questions feel free to ask!

This is clever, what a fun idea!
ReplyDeleteOh I'm going to have to make one of these. x
ReplyDelete