i'm excited to bring you this fantastic diy by katrina alana today - i can't wait to try it out myself!
Steps:

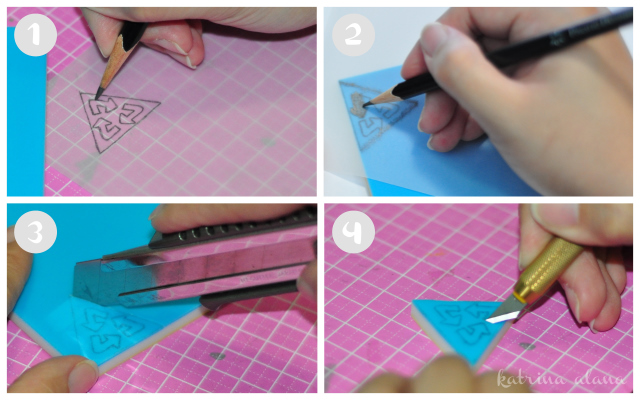
- Draw a design on the tracing paper or download our recycle rubber stamp pattern here.
- Flip the tracing paper so that the design you drew is facing the carving rubber. Go over the design with a pencil to transfer the image.
- Cut the edge of the design using the cutter.
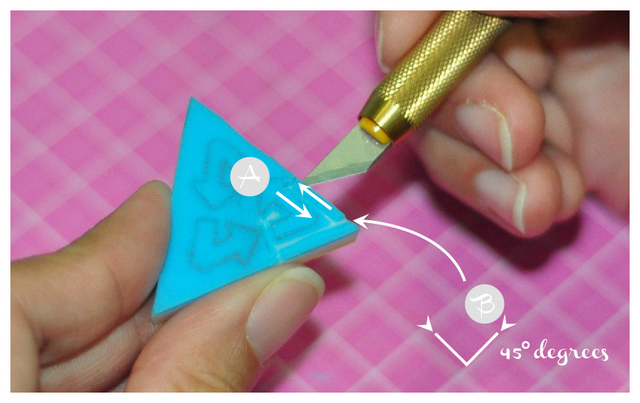
- Cut-out the design using the pen knife making sure that you carve at a 45 degree angle.

Make sure you cut one section of the design at a time. Cut at a 45 degree angle going one way and cut at a 45 degree angle going the opposite way. You will make a V shape incision. Go over sections of the design until you completely remove the excess rubber.


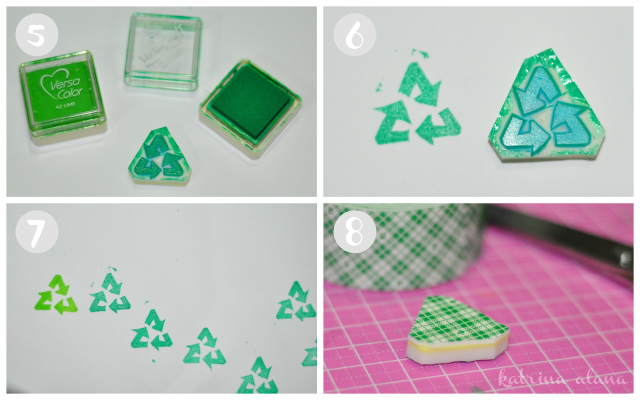
- Ink the carved rubber stamp.
- Make a test impression.
- Carve-out any imperfection and do a test impression until you’re happy with the rubber stamp.
- Stick the mounting tape and remove any excess tape by cutting it off.

- Stamp the design on tracing paper and trace the outline of the rubber stamp as well. This will allow you to position the stamp on the wooden block properly.
- Once you have an idea on how to position the stamp, stamp on the wooden block.
- Clean the stamp using the baby wipes. Baby wipes are perfect for cleaning used rubber stamps.
- Use glue or Modge Podge and a brush to seal the wooden block.
huge thanks to katrina alana for this post - be sure to go visit their website


I've always wanted to try this! Thanks for the great tutorial :)
ReplyDeleteawesome, that looks great. thanks so much for sharing!
ReplyDeletecool, thats something to do. :) thanks!!
ReplyDeleteThis as a fantastic and so simple way of making stamps,
ReplyDeleteI cant wait to try it
awesome post, i really like this. Thanks for sharing important blog with us.
ReplyDelete